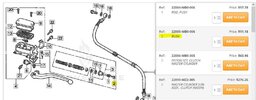
So there's this part on our STs.
It's a small part.
Downright tiny part.
All of about 10x10mm.
Made of brass.
It wears and affects the rideability of our bikes.
And it costs $10 USD!
What this exotic part you ask?
The bushing in your lever that actuates the clutch.
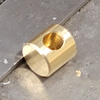 ,
,
A while back I decided $10 couldn't be right. For that little part? And apparently the retailers felt the same and that part that was $9.99 a few months ago is now $13.83!!
Enough. I have access to a milkcrate full of brass rod and a high school metal shop full of machine tools (remember that).
I'm going to make my own. Let's call it a "personal on-shoring" of industrial production.
First thing was to get the measurements.
The Mitutoyos say: 9.93mm diameter, 10.01mm tall and the hole...
Well calipers aren't the best way to measure a small hole. Gauge pins are. But... high school metal shop. Such exotic items wouldn't last a school day without getting lost, bent, welded onto some other scrap of metal. Only kidding, but no, there are no gauge pins to be found.
However, I do work to keep the teacher's drill index fully stocked. A No. 8 twist drill was a perfect fit. 0.199" Better than a gauge pin. It can tell me the size and make more of those holes in my brass rod.
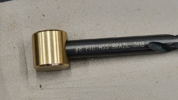
First step decide on a length to turn. I'm not making just one. I'm making several in batch fabrication mode. I chucked enough to make what turns out to be nine bushings. So, 10mm per part, plus 5mm for kerf. So about 150mm or 6" of stock and another 2" to chuck it.
I spot drill the end first and then chuck it with a live center during the turning operations.
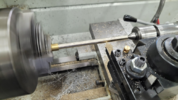

Note the condition of the jaws on the chuck. High School Metal Shop
Parting off is always satisfying.
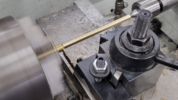
I didn't have the abrasives for a nicer finish than this. High School Metal Shop But it will burnish during use pretty quickly. Notice the chamfer on the edge of the hole in the OEM part.
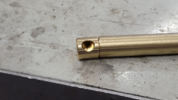
I was so eager to part off the rod once I reached the target O.D. that I forgot about some useful operations best done before parting on the lathe. That was marking those 10 and 5mm sections in the metal itself using the DRO (digital readout - the electronic display of the position of cross slide).
Back onto the lathe.
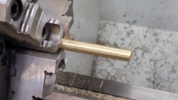
Next it was off to the mill where I clamped in some V-blocks, found the center using and edge finder and the DRO and spot drilled where the holes would be placed.

Followed by using that same No. 8 drill I used to measure the hole in the OEM part to make the holes in my rod. 0.330" to be exact.
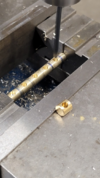
The floor of the hole in the OEM is square - they either plunged a square-ended mill to make the hole, or drilled and finished with a mill. Regardless, at the moment the floor of my holes have a 125° to 135° angle. I'm not sure if I want or need to bother with making it square. We don't have 0.200" endmills. Nor do we have 5mm endmills. 'Murica damn it!
That's where I left it Tuesday. Back to the shop tomorrow (Thursday) to chamfer the holes and part them off. The finish of the ends is irrelevant. As is nearly the length. I want full engagement with the bore in the lever; it just must not protrude to the point where it interferes with its movement into the body of the master cylinder.
Stay tuned...
It's a small part.
Downright tiny part.
All of about 10x10mm.
Made of brass.
It wears and affects the rideability of our bikes.
And it costs $10 USD!
What this exotic part you ask?
The bushing in your lever that actuates the clutch.
 ,
,
A while back I decided $10 couldn't be right. For that little part? And apparently the retailers felt the same and that part that was $9.99 a few months ago is now $13.83!!
Enough. I have access to a milkcrate full of brass rod and a high school metal shop full of machine tools (remember that).
I'm going to make my own. Let's call it a "personal on-shoring" of industrial production.
First thing was to get the measurements.
The Mitutoyos say: 9.93mm diameter, 10.01mm tall and the hole...
Well calipers aren't the best way to measure a small hole. Gauge pins are. But... high school metal shop. Such exotic items wouldn't last a school day without getting lost, bent, welded onto some other scrap of metal. Only kidding, but no, there are no gauge pins to be found.
However, I do work to keep the teacher's drill index fully stocked. A No. 8 twist drill was a perfect fit. 0.199" Better than a gauge pin. It can tell me the size and make more of those holes in my brass rod.

First step decide on a length to turn. I'm not making just one. I'm making several in batch fabrication mode. I chucked enough to make what turns out to be nine bushings. So, 10mm per part, plus 5mm for kerf. So about 150mm or 6" of stock and another 2" to chuck it.
I spot drill the end first and then chuck it with a live center during the turning operations.


Note the condition of the jaws on the chuck. High School Metal Shop
Parting off is always satisfying.

I didn't have the abrasives for a nicer finish than this. High School Metal Shop But it will burnish during use pretty quickly. Notice the chamfer on the edge of the hole in the OEM part.

I was so eager to part off the rod once I reached the target O.D. that I forgot about some useful operations best done before parting on the lathe. That was marking those 10 and 5mm sections in the metal itself using the DRO (digital readout - the electronic display of the position of cross slide).
Back onto the lathe.

Next it was off to the mill where I clamped in some V-blocks, found the center using and edge finder and the DRO and spot drilled where the holes would be placed.

Followed by using that same No. 8 drill I used to measure the hole in the OEM part to make the holes in my rod. 0.330" to be exact.

The floor of the hole in the OEM is square - they either plunged a square-ended mill to make the hole, or drilled and finished with a mill. Regardless, at the moment the floor of my holes have a 125° to 135° angle. I'm not sure if I want or need to bother with making it square. We don't have 0.200" endmills. Nor do we have 5mm endmills. 'Murica damn it!
That's where I left it Tuesday. Back to the shop tomorrow (Thursday) to chamfer the holes and part them off. The finish of the ends is irrelevant. As is nearly the length. I want full engagement with the bore in the lever; it just must not protrude to the point where it interferes with its movement into the body of the master cylinder.
Stay tuned...


