Article [13] ST1300 - Brake Maintenance - Getting all the air out of the brake system

In my opinion expecting a vacuum pump alone to completely rid a complicated hydraulic system of all air is misguided and a misuse of the vacuum pump on the part of the user. It is not the fault of the vacuum pump if it is being used for a purpose that it is not particularly good at. That does not diminish the value of the vacuum pump however. They are excellent tools for moving high volumes of fluid quickly and easily through the system when that is necessary. That can be for the purpose of draining a system, refilling a system, or flushing a system. That is primarily what I think that they should be used for. In addition to using a tool, knowing what tool to use when is also part of the process. Knowing the limitations of the tools being used is another part of that process. Making poor choices anywhere in that process reflects poorly on the person making the choice, not on the tool. As common as it is the old adage the right tool for the job is not just an adage.
 
As common as it is the old adage the right tool for the job is not just an adage.
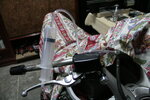
This is true.
What's not included in that truism, is there are times when to complete a job correctly, more than one tool *may* be required.
Yay!
And who couldn't use another tool? :)
 
In my opinion expecting a vacuum pump alone to completely rid a complicated hydraulic system of all air is misguided and a misuse of the vacuum pump on the part of the user.

Maybe. But works well if you know how to use it. Results I was happy with (which is of course still far from nirvanic euphoria from a Igofarded bleed).
 
Pick a weekend and ride over to Arizona and I will bleed your brakes for you, and if they are not better than when you did them with your method, it’s free.
And, I’ve always got have a dozen MP check valves in the tool box if you want to learn how to do it much easier, with less mess, and nothing to clean up afterwards.
What have you got to loose?

Not my method. Never used Vacuum on the ST myself. MP only.

The old now retired mechanic was the one using vacuum (no hand activated pump, but air pressure operated vacuum pump with continuous sustained vacuum). And so was a local dealer way back then when they were still selling STs.

I am sure I'd be elated with an Igofar supervised bleed. My own bleeds don't feel too bad either....but start feeling mushy 500 miles down the road. Not so with the mechanic's bleeds.

The fluid you start with can also make a difference as there is a range on allowable air in solution. If you are unlucky and start with air on top of the range, brakes that are rock solid at sea level can turn scary mushy over a 14er (same with clutch). And solid again once back at sea level.

Along these lines, an AZ bleed at close to 3000 ft is bound to feel pretty good at my sea level.....

People who really care will syringe degas the fluid before injecting into the master reservoir (just pouring from the container can entrain more air). Top racing will pull a vacuum on their fluid prior use to reduce dissolved air and moisture. There are reasons why vacuum makes sense.

I truly appreciate your offer as we all know there is no better bleed than an Igofar bleed. But that would be the difference between being very happy with the brakes and being very very happy with the brakes; Reaching the point of diminishing returns...while there are other things needing close attention on the bike.
 
Last edited:
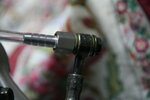
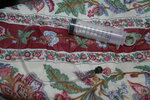
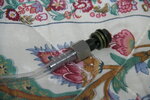
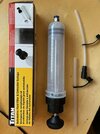
Hello. I want to share how I would put the brake fluid using positive pressure in order to drag all the bubbles out with more ease than using vacuum. It's easier to push bubbles, as that compress them, than pull them, which expand those. That's why I though of a tool for pushing the brake fluid with some good pressure and speed, not such high pressure but good speed, as it's more valuable for dragging bubbles out of places where those could be stuck. Check the pictures, it's self-explanatory. All parts can be find in AliExpress, and using that nice valve for stopping backflow that you can buy also there, that's all you need for the task I think.

PD: Have in mind that you need to pair the thread of the banjo and the spigot adaptor. I used a M10x1 thread in both. You have also M10x1.25 sizes, so be sure to match both. Our bikes use M10x1.25 but I'm not sure if the spigot adaptor came in that size. You could use the original banjo bolt if you find that adaptor in that size.
 

Attachments

  • IMG_8828.JPG
    IMG_8828.JPG
    136.4 KB · Views: 23
  • IMG_8829.JPG
    IMG_8829.JPG
    72.1 KB · Views: 23
  • IMG_8831.JPG
    IMG_8831.JPG
    183.8 KB · Views: 23
  • IMG_8833.JPG
    IMG_8833.JPG
    141.4 KB · Views: 24
Thanks for the contribution. I have read/heard that that is how some 'professional' mechanics do the job. I have thought about it but I have not been able to come up with an answer to this question: How does the rear caliper circuit cope with the one way valve in the SMC - which is designed specifically to prevent fluid from flowing back through the system - except through the three tiny compensation ports.
 
Thanks for the contribution. I have read/heard that that is how some 'professional' mechanics do the job. I have thought about it but I have not been able to come up with an answer to this question: How does the rear caliper circuit cope with the one way valve in the SMC - which is designed specifically to prevent fluid from flowing back through the system - except through the three tiny compensation ports.

Good question. Notice that this idea push the flow from the master cylinder, not backwards. So it would flow in the correct way in order to surpass that valve. Maybe could need a bit of a rushed push to pass it, but should do it with no problem as it would be in favour of it and not against it. It requires to dissasemble the banjo connector and to connect the device to it. The remaining bubbles should get up to the main brake fluid container, so shouldn't be hard to take out just those after flushing all the circuit and connecting again the banjo thing to the master cylinder, which should be filled up and then those last bubbles should come up from that banjo connector and hose.
 
I got to attatch a pressure meter to the front master cylinder. Just out of curiosity. I reached max 250 bar with maximum hand effort. Common bit of hard braking use less than 100 bar.
 

Attachments

  • 20250219- manómetro presión freno st1300.mp4.zip
    2.8 MB · Views: 8
I bought one of these at KMS Tools to remove most of the fluid from the reservoirs prior to bleeding, no sense starting a flush with a shot of two year old fluid even if it looks clean.
Pulls a good vacuum and might work well as a pump but would need two sets of hands.
IMG_6694.jpg
 
Good question. Notice that this idea push the flow from the master cylinder, not backwards.
No - I didn't notice that. That is different. But I thought that you said you were pushing the bubbles up ?? Thta's why I assumed that the pressure was being applied at the bleed valve.

I did have such a kit once, but it didn't provide the means to pressurise a bike style reservoir - so I could never use it. But the master cyclinde rprovides a considerable amoutn of pressure.

Master cylinder provides a brutal 250 bar pressure, but it's useless as it only moves like 20 ml forward AND BACK. With this you move 100 ml forward and can take out the syringe and fill it again to put another 100ml more without backing movements. More flow and speed with a big manual syringe, no need for high pressure but just a good positive one for getting speedy bubbles so they came out easier.

I said and thought before about pushing the bubbles up, that's right. But because that valve you mention is that I thought about this other method, even if I should push them down. If I get enough speed wouldn't be a problem to drag them down.

I just got the idea of making a continuous cyclical flow of brake fluid using just one more flushing valve (two valves) and this syringe. Could be great, pushing fluid in one end and taking back the bubbly fluid to the clean fluid deposit so you make it get all out fast without running out of clean fluid.

Anyway, I'm showing results in the future.
 
A detailed look at the process of getting the air out of the Honda ST1300 brake lines. A sequence of diagrams of the brake circuits, colour coded to show which parts of the system are being accessed when each bleed valve is opened and explanations of where the trouble spots are.

These are just small thumbnail images of some of the pages. Load the attached pdf to get the full document.


ST1300-Remove Air Step 1 2.jpg ST1300-Remove Air Step 3.jpg ST1300-Remove Air Step 4.jpg ST1300-Remove Air Step 5 6.jpg ST1300-Remove Air Step 7.jpg


Prior to that, it is worth taking a look at a couple of videos. I had a picture in my head of how the bubbles would behave - that bubble would collect together at the highest point of the line and that if I pumped the lever fast enough that would take the bubbles with it.

I was surprised at how wrong I was.

First - a sealed jar of water coloured with black ink. I was blowing steadily into a tube fed into the jar, pushing the fluid down the tube. I am pointing out the location of trapped bubbles. Sorry - no commentary. I cannot talk and blow at the same time !


And another, this time sucking on a long tube on the left of the video as the fluid negotiates an 'n' shaped bend. I am sucking continuously all the time the video is playing - the fluid looks static in one or two places, but it is actually flowing through that long vertical air bubble. The video stops as the fluid is about to reach my mouth.


Click the link below to download the pdf file.
Fantastic manual, thank you very much. I am in the middle of this now and wasn't sure of the sequence.
Having trouble getting the Circlip to stay in the SMC, popped out twice. :-( - would you have any advice on that?
 
Fantastic manual, thank you very much. I am in the middle of this now and wasn't sure of the sequence.
Having trouble getting the Circlip to stay in the SMC, popped out twice. :-( - would you have any advice on that?

The SMC circlip is a bit tricky. You may need three hands. As you hold the whole thing, you should PUSH the washer holding all together down, as it has like a step on it that avoids the circlip to be "open" to the insides. So you should push that washer first, then press the circlip, then take it out, all while you hold down that washer. Then all opens up. Good luck.

EDIT: I just noticed what you are saying, I just misunderstood the thing. You could try open that circlip so it gets its good shape again, if not, check if the step where it gets holded is rounded up. If it is, bad news, as it's getting out because the "step" is damaged. If not, it could be that the circlip is not pressing against the wall, so it gets out by itself. Hope this helps. Good luck again.
 
That circlip is a pain to get at, and even more difficult to get back in.

I describe what I do in the link below - but it us something that the manual tells you not to do. But taking care, and some measurements beforehand, it is something that works for me.

 
Back
Top Bottom