AZ 2005 build - Are you ready for another one?

Well, not really progress, but yesterday I realized that when I put the swingarm back on, I had the rubber dust cover on the swingarm, instead of the back of the engine, like you are supposed to! :doh1: When I pushed the swingarm forward the rubber dust cover got caught in the u-joint! And there was no way to pull it out of the shaft area. So, I had to pull the swingarm back off, and reset the dust cover to the back of the engine and pushed the swingarm back in place and bolted it back up.

Well, at least now, I'm proficient at removing and re-installing the swingarm! :bump:

And I'm done for the week. :rolleyes-2x:
 
I've returned to the Crime Scene and got more done today!

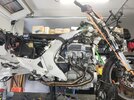
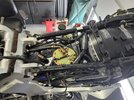
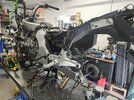
I installed the headers, shock, lower tank, the smaller heat shields, the steps, placed the bolts for the crash bars.

20250507_Progress1.jpg

20250507_Progress6.jpg20250507_Progress5.jpg

And, BTW Larry ( Igofar ) note the axle in in the correct direction! :rofl1:

I'm thinking I just might install the radiator tomorrow. :unsure:
 
I've returned to the Crime Scene and got more done today!
Sirbike’s photos looked more gruesome lol. But seriously though, great write-up so far. I’ve taken apart many bikes over the years…only one or two may have made it back together so kudos! :roflmao:
 
Sirbike’s photos looked more gruesome lol. But seriously though, great write-up so far. I’ve taken apart many bikes over the years…only one or two may have made it back together so kudos! :roflmao:

Well, as I stated earlier in this thread, this is the first time for me to swap out engines. (And I'm sure it will be my last, too! ) I have bought three other ST1300s that were wrecks and I had to do a lot of work to them to get them back on the road, just not this much work! LOL
 
I guess I should add, when trying to get that upper radiator hose on (the one on the left), I was having a fit with it, so I decided to remove the front of the Thermostat housing, the part that hose connects to. In doing so ( I wasn't planning on replacing the thermostat, itself, so I never opened up the Thermostat housing - one of my gems I bought off eBay :rolleyes: ) I found that the thermostat was bad. So I replaced it with one I had in my parts bins, that looked a lot better!

It just doesn't pay to clip corners... ;)
 
Seems like a good time to eliminate the Secondary Master Cylinder and its associated problems.
I've thought of that, but this one should be okay, although I really haven't had time to play with it yet.
 
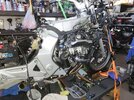
I mounted the two crash bars and the "smog" canister. I still need to attach air lines to the canister. I also attached a battery (almost dead) and I got it to turn over, but without any gas in the lower tank, it's not going to run. I have the battery charging now.

20250509_Crashbars1.jpg

20250509_Crashbars2.jpg

It'll be next week before I can add gas and get it started. Although, next week, is a short week for me, since we have to go up north to one of my grand daughter's graduation on Thursday.
 
Good job Bob, However, the bolt with the 8mm head that you have holding the cross over brake lines to the left fork lower is in the wrong place.
That should be a 10mm head bolt. The 8mm black bolts are to the rear fender attachment points ;)
And thank you for turning your axle back around the correct way :rofl1:
 
....the bolt with the 8mm head that you have holding the cross over brake lines to the left fork lower is in the wrong place.
That should be a 10mm head bolt. The 8mm black bolts are to the rear fender attachment points ;)
...

Interesting, since I haven't touched the brake lines on the front forks, at all. It must have been the mechanic that worked on it before me! :rofl1: :rofl1: :rofl1:
 
Well, HOT DANG! :run1:

I must have done something right! I charged the battery overnight and shot some starter fluid down the throats of the throttlebody and it started right up and ran for about 15 seconds, which is when, I turned the key off. :thumb:

So, I'll continue Monday with the reassembly and I might be able to run it around the block next week! :hat3:
 
Okay, a "little" more progress today!

I connected the throttle cables:

20250512_ThrottleCables.jpg

Flushed out the clutch:

20250512_LeftBackEnd.jpg

Added a Shock Guard:

20250512_ShockGuard.jpg

That's about it for the day. My right foot is now giving me pain, so I couldn't stay on it too long.
Could you share the template of the shock guard?
I know that there is one on the forum threads somewhere, but I wasn't able to find it.
Thanks!
 
After running it a second time for another 15 minutes, I still do not smell nor see any coolant! I'm keeping my fingers crossed! :pray1:

Also, I've decided to wait and swap out the tires, before mounting the rear up. And since I'll be heading out for a couple of graduations, I probably won't do too much more to this bike, until I get back.

I did add the rear cowl though.


20250513_Tail-1stPlastic.jpg
 
Back
Top Bottom